Categories
aortic dissection TEVAR training trauma

Broken Aorta, Advancing Technology

CT_1
The ligamentum arteriosum, the remnant of the ductus arteriosus between the aortic arch, tethers the arch causing a tear during sudden deceleration like hitting a steering wheel with your chest

I recently repaired a traumatic aortic dissection and was struck by how far along things had progressed since I was a resident. I remember seeing a Q&A in the mid nineties where Dr. Mattox expounded on the gold standard for diagnosing traumatic aortic injuries which at that time was contrast aortography. This caused many struggles trying to arrange for arteriography in the middle of the night (these accidents usually occur then). The repairs were open and very morbid for severely injured patients, particularly those with closed head injuries and fractures. This all changed in the early 2000’s as I had mentioned in an earlier post (link). The grafts were homemade (figure)

img_1232

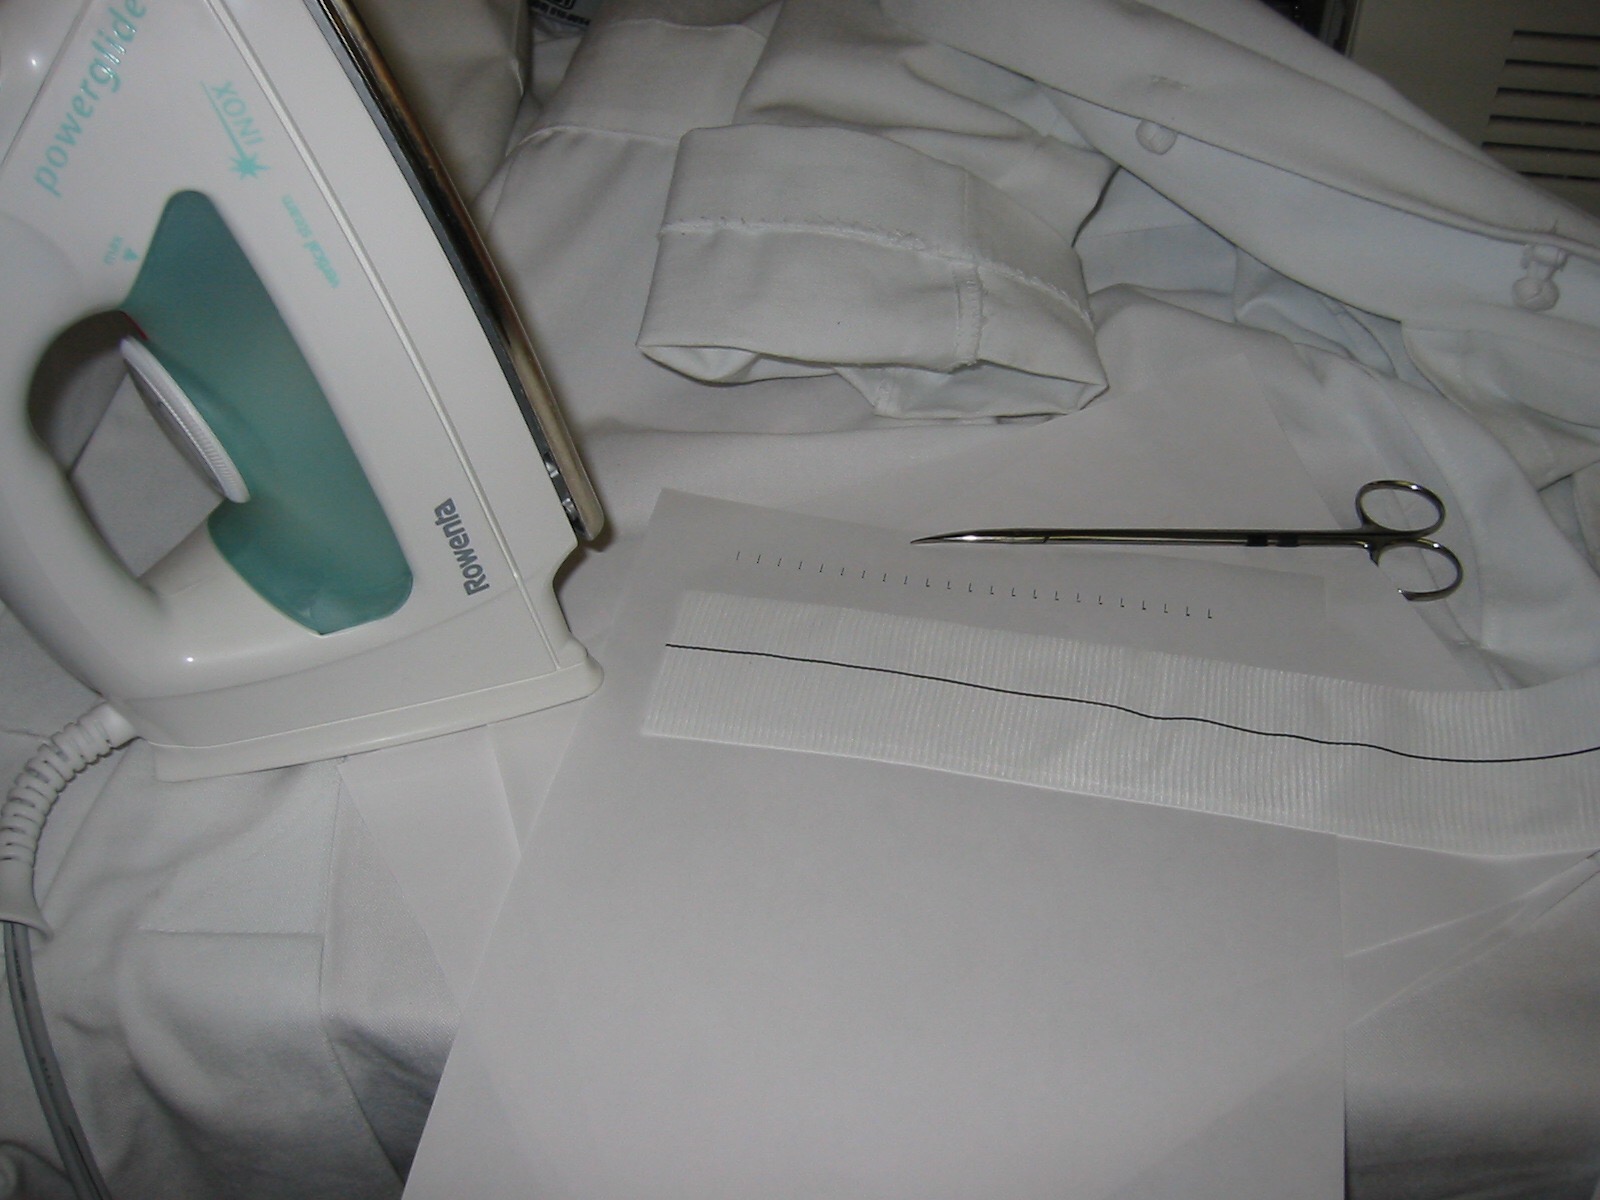
and this was literal -the picture is from my kitchen back in the Bronx in 2004. The grafts were cumbersome to deploy and required long 24-28F sheaths that frequently required iliac and aortic exposures.

img_1233

The revolutionary breakthrough was the fact that thoracotomy and partial cardiac bypass could be avoided. Durability was largely assumed as these patients rarely came back for followup.

img_1237

Fastforward to 2015. CTA is done with 64 slice CT scanner with EKG and respiratory gating eliminating the artifacts that caused Dr. Mattox to assert that aortography was the gold standard. Software based image reconstruction can aid treatment planning in ways that greatly exceed the caliper and ruler methods we had in 2004.

CT_4

The grafts are currently into their second generation of development and have small profile and trackability that allows for percutaneous delivery and treatment.

aortogram trauma

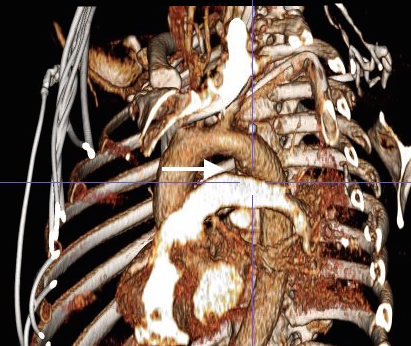
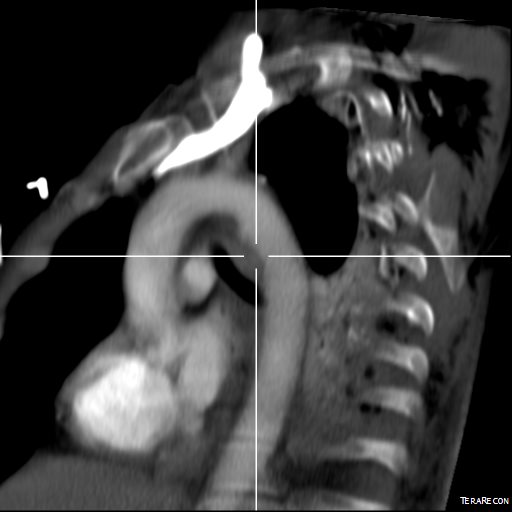
The aortogram shows the tear along the inner curve. These lesions typically require coverage either partial or total of the left subclavian artery origin. This patient had a dominant right vertebral artery and I felt he would tolerate even full coverage of the left subclavian.

aortogram trauma close arch

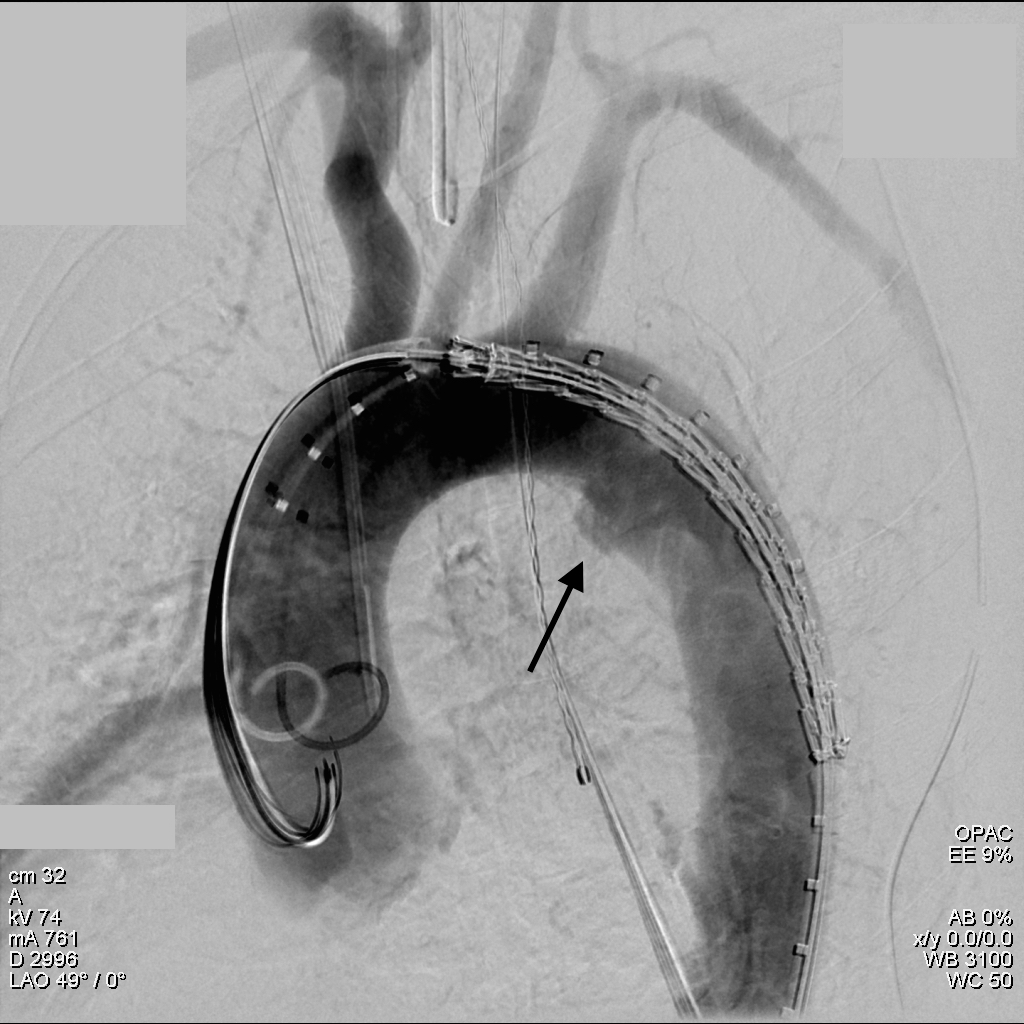
The device, a Gore C-TAG device which has an FDA trauma indication, is clearly better than our homemade device. Deployment does not require pharmacologic or electrical bradycardia or asystole.

aortogram post stent trauma

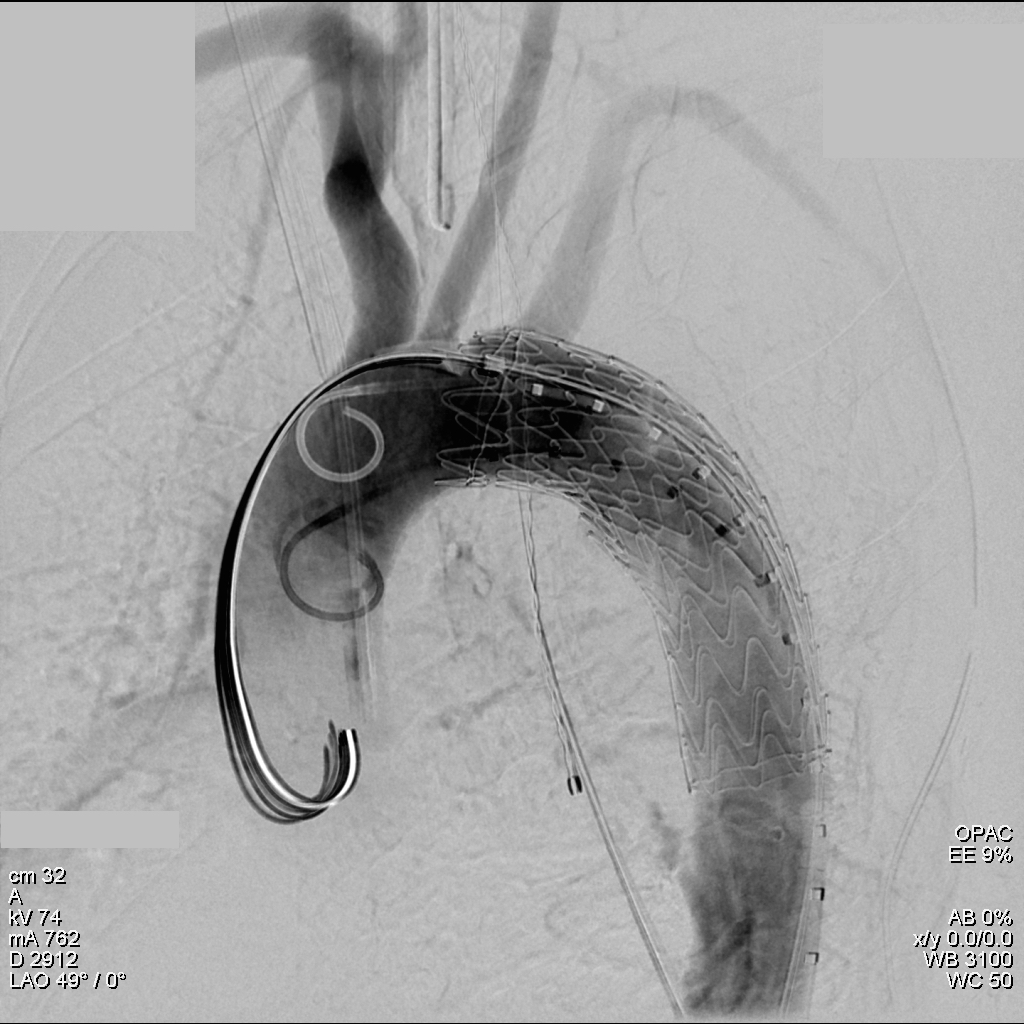
The idea behind this design is conformability of the smaller stent elements. The aortic injury is even outlined by the stents in the aortogram above. The bird-beaking that was common to the prior generation of graft is not seen in this aortogram.

Where does this need to go next? At 18-24F access requirements need to become 12-18F and for the same reason, the grafts need to be available down to 14-18mm as trauma doesn’t just happen in middle aged men. Aside from that, it is a definite improvement over what we had in 1995 and in 2004.

Categories
techniques TEVAR training

Kitchen-top Thoracic Stent Graft

IMG_1237

Before manufactured thoracic stent grafts were approved for use, you had to make your own. I think that even in theory you should have this in your mental locker, because it is pretty straight forward to accomplish. The patient was a homeless man who got struck by an SUV while crossing Broadway merely blocks from Columbia Presbyterian. The specifics are lost to time, but he was found to have among his multiple injuries a tear in his thoracic aorta at the ligamentum arteriosum. Cardiothoracic surgery felt that he was far too high a risk to undergo open repair. I was on call, and when I looked at this patient’s scans, I realized that he might survive with a stent graft across the tear, but the only suitable grafts were short aortic cuffs intended for infrarenal repair with short delivery systems. Being young staff, I called our site chief at that time, a grizzled veteran, for some advice about making stent grafts.

IMG_1232IMG_1234
The process is simple enough, and discovering it is like finding out that a seemingly complicated dish has an exceedingly simple recipe. The process starts with an iron and an ironing board, with which you press flat a Cooley graft of 32 or larger diameter. The Cooley graft is a fine weave graft that has pressed cylindrical folds that allow you to collapse it like a Slinky toy. Ironing between two sheets of paper allows you to avoid overheating the fabric.

IMG_1233
Once flattened and stretched, it is now ready for placement of stents. The stents shown here are Gianturco stents which typically are constrained with a monofilament and has barbs. The barbs are removed with needle nose pliers. 5-0 monofilament suture is used to secure the stents in the graft. More spacing allows for the graft to accommodate tortuosity, but the graft may bunch up in the sheath. The top and bottom stents should be within 5mm of the graft edge –this way you will remember that at deployment.

IMG_1235
For this case which required only one stent, three were made and they were autoclaved. Loading into a large sheath of 24F is done over a catheter to preserve a wire channel. The graft is pushed in using the umbilical tape or silk suture technique referenced in Oderich’s paper about reloading modified stent grafts.
Because of the large deliver system, a conduit was required and sutured end to end into the common iliac artery –I no longer do this unless there is a problem with severe plaque requiring endarterectomy. The graft was deployed by push-pull technique with the heart rate slowed pharmacologically. The patient stabilized from this, took several months to recover from his other injuries but was discharged and lost to followup.

IMG_1236IMG_1237
Is this knowledge helpful? In 2015, debatable, but in 2003, it saved a life.